8")

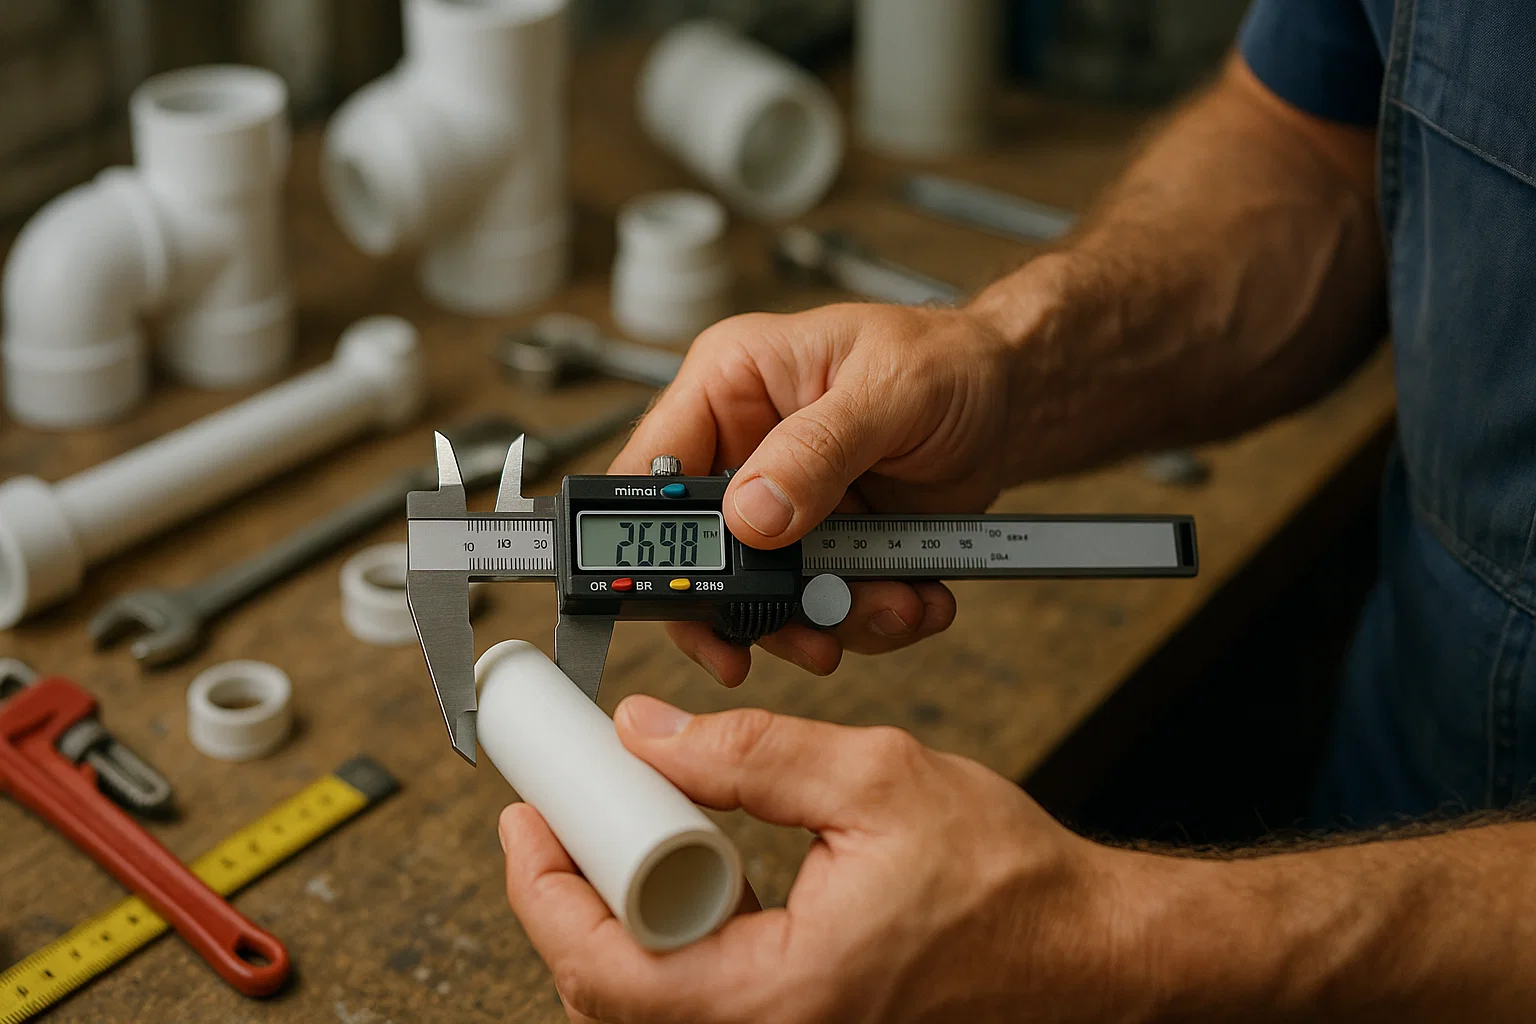
Table of Contents
Choosing the wrong pipe size can cost you thousands in repairs, water damage, and system failures. Without accurate measurements, even the most expensive PVC pipes and PPR fittings become worthless. Whether you’re working with drainage systems, irrigation networks, or residential plumbing, mastering pipe measurement is essential for project success.
Quick Facts

Before diving into measurement techniques, understanding pipe sizing terminology is critical. Nominal pipe size (NPS) refers to the standardized dimension used across the industry, while actual diameter measurements differ based on pipe material and application.
Outer Diameter (OD): The total width measurement from one outer edge to the opposite outer edge of the pipe. This dimension is crucial when working with HDPE pipes and CPVC systems.
Inner Diameter (ID): The measurement of the pipe’s internal opening, which determines flow capacity and volume. Understanding ID is essential for calculating water pressure requirements.
Wall Thickness: The difference between the outer and inner diameter, divided by two. This affects the pipe’s pressure rating and durability, especially important for high-pressure PVC valves.
Schedule Rating: A standardized thickness classification system used primarily for PVC and steel pipes, ranging from Schedule 10 to Schedule 80.
Key Takeaway
Nominal size is a naming convention, not a measurement. Before you buy a single fitting, confirm the pipe’s actual outer diameter — that’s the number fittings are sized against, not the “1-inch” label on the box.

Accurate measurements demand the right equipment. Professional plumbers and DIY enthusiasts should invest in quality measuring tools:
Digital Calipers: Provide precision measurements to 0.01mm accuracy, essential for matching PPR pipe fittings with exact specifications.
Pi Tape (Diameter Tape): Specially calibrated to measure pipe circumference and automatically convert to diameter readings. Invaluable for large-diameter drainage pipes.
Standard Tape Measure: Basic but necessary for quick measurements and verifying pipe lengths before cutting PVC pipe.
Pipe Gauge: A specialized tool with standardized holes matching common pipe sizes for quick identification.
String and Ruler Method: Cost-effective alternative using string to measure circumference, then calculating diameter using the formula: Diameter = Circumference ÷ π (3.14159).

PVC pipe systems are among the most common in residential and commercial applications. Measuring PVC accurately prevents costly installation errors and ensures proper flow rates.
Step 1: Clean the Pipe Surface Remove any dirt, labels, or debris from the measurement area. This ensures your calipers or tape measure can contact the pipe surface directly for accurate readings.
Step 2: Measure the Outer Diameter Position your calipers or tape measure across the widest point of the pipe’s exterior. For standard PVC pipe sizes, this should align with industry specifications.
Step 3: Determine Nominal Size Compare your OD measurement to standard sizing charts. A 1-inch nominal PVC pipe typically has an OD of 1.315 inches, while a 2-inch nominal pipe measures 2.375 inches OD.
Step 4: Verify with Multiple Measurements Take at least three measurements at different points along the pipe to account for manufacturing variations or deformities.
Step 5: Check Wall Thickness If accessible, measure the pipe’s wall thickness to determine the schedule rating. This is critical before gluing PVC pipes to ensure compatible fittings.
Those OD numbers aren’t approximations — they’re locked in by the Iron Pipe Size (IPS) standard that PVC nominal sizing is built on, which is why a 1-inch nominal pipe measures exactly 1.315 inches OD regardless of manufacturer.
Most quality PVC pipes from reputable manufacturers include printed specifications:
Key Takeaway
Always measure the outer diameter, never the inner. It’s the single most common measurement mistake, and it’s the one most likely to leave you with a fitting that simply won’t seat correctly.

Matching pipes to fittings requires precision because even minor discrepancies can cause leaks or connection failures. Understanding fitting measurements prevents installation headaches.
External Thread Measurements: Use calipers to measure thread diameter at the widest point. For PVC valves, thread size often differs from pipe nominal size.
Internal Socket Measurements: Measure the inside diameter of slip fittings to ensure proper pipe insertion. Standard slip fittings provide 0.010-0.020 inches clearance for PVC glue application.
Fitting Length and Hub Depth: Measure from the fitting face to the internal stop to determine insertion depth. This ensures pipes seat properly before welding PPR pipes or applying adhesive.
Reducing Fittings: Listed as larger size by smaller size (2″ by 1″ reducer) Tee Fittings: Specified as run by run by branch (1″ by 1″ by 1/2″ tee) Elbows: Identified by single size and angle (3/4″ 90° elbow)
When working with different pipe materials, verify compatibility:

Proper pipe sizing calculations prevent flow restrictions and pressure losses that compromise system performance. Engineers and installers must consider multiple variables.
Formula: Q = A × V
Where:
Example Calculation: For a 2-inch pipe with 5 fps velocity:
Friction loss increases with flow velocity and pipe length. Understanding pressure dynamics helps select appropriate pipe diameters for:
Residential plumbing uses fixture unit methodology:
Total fixture units determine minimum pipe diameter requirements according to plumbing codes.
Choosing the best pipe material involves consulting:
Beyond IPC and UPC codes, larger commercial and industrial projects often reference ASME B36.10 and B36.19 for pipe dimension standards — worth checking if your project crosses from residential into commercial-grade specifications.
Key Takeaway
Pipe size isn’t just about fitting two pieces together — it determines flow rate and pressure loss for the whole system. Size for the flow you actually need, not just the diameter that happens to be in stock.

Even experienced professionals make measurement errors. Awareness prevents costly mistakes that delay projects and increase expenses.
Measuring ID Instead of OD: Most pipe specifications reference outer diameter. Measuring the internal diameter leads to undersized fitting selections.
Ignoring Temperature Effects: PPR pipes expand when exposed to heat. Allow expansion clearance in hot water applications.
Confusing Nominal vs. Actual Size: A 1-inch nominal pipe doesn’t measure exactly 1 inch. Always verify actual dimensions against sizing charts.
Neglecting Wall Thickness: Two pipes with identical OD but different schedules aren’t interchangeable. Check wall thickness before repairing pipe leaks or making connections.
Assuming Universal Standards: European and American sizing systems differ. HDPE pipe specifications vary by region and application.
Multiple Measurement Points: Take readings at several locations to identify manufacturing defects or damage.
Cross-Reference Markings: Verify measurements against printed pipe specifications.
Account for Degradation: Older pipes may have reduced wall thickness from corrosion or wear, especially in blocked drainage systems.
Key Takeaway
If you only remember one thing from this section: measure outer diameter, not inner. Almost every other mistake on this list is a downstream consequence of getting that one detail wrong.

Industry experts rely on proven techniques for consistent, reliable measurements across all pipe materials and applications.
Use the Right Tool for Each Material:
Document Everything: Photograph measurements with rulers visible in frame. This creates verifiable records for quality inspection and future reference.
Consider Environmental Factors: Temperature, humidity, and installation stress affect pipe dimensions. Measure under conditions matching final installation environment.
Verify Before Cutting: Measure twice, cut once remains the golden rule. This is especially critical when cutting PVC pipe for permanent installations.
Irrigation Systems: Choosing irrigation pipe materials requires considering UV exposure, pressure ratings, and flow requirements.
Underground Installations: Locating broken underground pipes often requires specialized measurement techniques to assess damage extent.
Pool Equipment: Swimming pool systems demand precise measurements for pump and filter compatibility.
Complex projects benefit from expert assistance from established suppliers in Dubai and other regions who provide:
How do you actually figure out a pipe’s diameter?
Measure the outer diameter with calipers or a pi tape, then check that number against a standard sizing chart to find the nominal size. Can’t get calipers around it? Wrap a string around the pipe, measure that length, and divide by 3.14159.
What’s the difference between nominal size and actual size?
Nominal size is the label — like “1-inch” — used for ordering and specs. The actual size is what you’d measure with a tool in hand, and it often doesn’t match the nominal number exactly once you account for wall thickness.
Can I measure PVC pipe without calipers?
Yes, the string method works well. Wrap string around the pipe, mark where it meets, measure that length with a ruler, then divide by 3.14159. For smaller pipes, a regular tape measure across the outer diameter works too.
Can I use Schedule 40 and Schedule 80 pipe together?
You can, as long as the outer diameters match — which they do for the same nominal size. The wall thickness differs, but since fittings are sized to the outer diameter, both schedules connect to the same fitting fine.
How do you measure a threaded pipe correctly?
Measure across the outside of the threads themselves, not the pipe body behind them. Thread size doesn’t always match the pipe’s nominal size — a 1/2-inch NPT thread, for example, actually measures around 0.84 inches across.
What tools do I actually need for accurate measurements?
Digital calipers handle most jobs with precision. A pi tape is worth it for larger pipes, a standard tape measure covers lengths, and a pipe gauge gives you quick size checks without doing math.
Does temperature change my pipe measurements?
It can, especially with PPR pipe, which expands roughly 0.15mm per meter for every 10°C increase. For long runs in hot environments, build in some expansion allowance rather than measuring everything at one fixed temperature.
Why don’t European and American pipe sizes match up?
They’re built on two different systems. Europe uses metric DN (diameter nominal), while North America uses NPS in inches. If you’re sourcing pipe internationally, always double-check which standard the supplier is using.
How many times should I check measurements during a job?
Three checkpoints catch most mistakes: before you cut, before you install the fitting, and after the whole assembly is together. Skipping that last check is how small errors turn into leaks down the line.
What’s the best way to measure a damaged or bent pipe?
A flexible pi tape handles irregular shapes well since it conforms to the pipe. If a section’s too damaged to measure directly, measure an undamaged stretch instead and compare it against the spec sheet.
Accurate pipe measurement forms the foundation of successful plumbing, irrigation, and drainage installations. Understanding how to measure PVC pipe size, properly assess pipes and fittings, and calculate the pipe size for specific applications prevents costly mistakes and ensures long-term system reliability.
Whether you’re working with PVC, PPR, HDPE, or CPVC systems, investing time in precise measurements saves money, reduces waste, and creates professional-quality results.
For premium quality pipes, fittings, and expert technical support, explore the comprehensive range available at Dave Pools. Your trusted partner for all piping solutions.
Got Your Measurements? Now Get the Right Pipe.
Once you know your exact pipe size, Dave Pools has the matching fittings in stock — sized correctly the first time, with technical support if anything doesn’t line up.
Shop Pipes & Fittings by Size →