How to Glue PVC Pipe: 7 Easy Steps for Leak-Free Connections

Professional demonstrating how to glue PVC pipe with proper technique and tools

Introduction

Have you ever experienced a frustrating PVC pipe leak just days after installation? Poor gluing technique causes thousands of plumbing failures every year, leading to water damage, costly repairs, and wasted time. Whether you’re working on an irrigation system, drainage pipes, or home plumbing, knowing how to glue PVC pipe correctly is essential. This comprehensive guide provides a proven 7-step method that ensures leak-free, permanent connections every time.


What is PVC Pipe Glue and Why It Matters

PVC pipe glue, technically called solvent cement, doesn’t actually “glue” pipes together in the traditional sense. Instead, it creates a chemical weld by dissolving the outer layers of both the pipe and fitting, which then fuse together as the solvent evaporates. This creates a permanent, watertight bond that’s stronger than the pipe itself when done correctly.

Close-up of PVC cement creating chemical weld between pipe and fitting

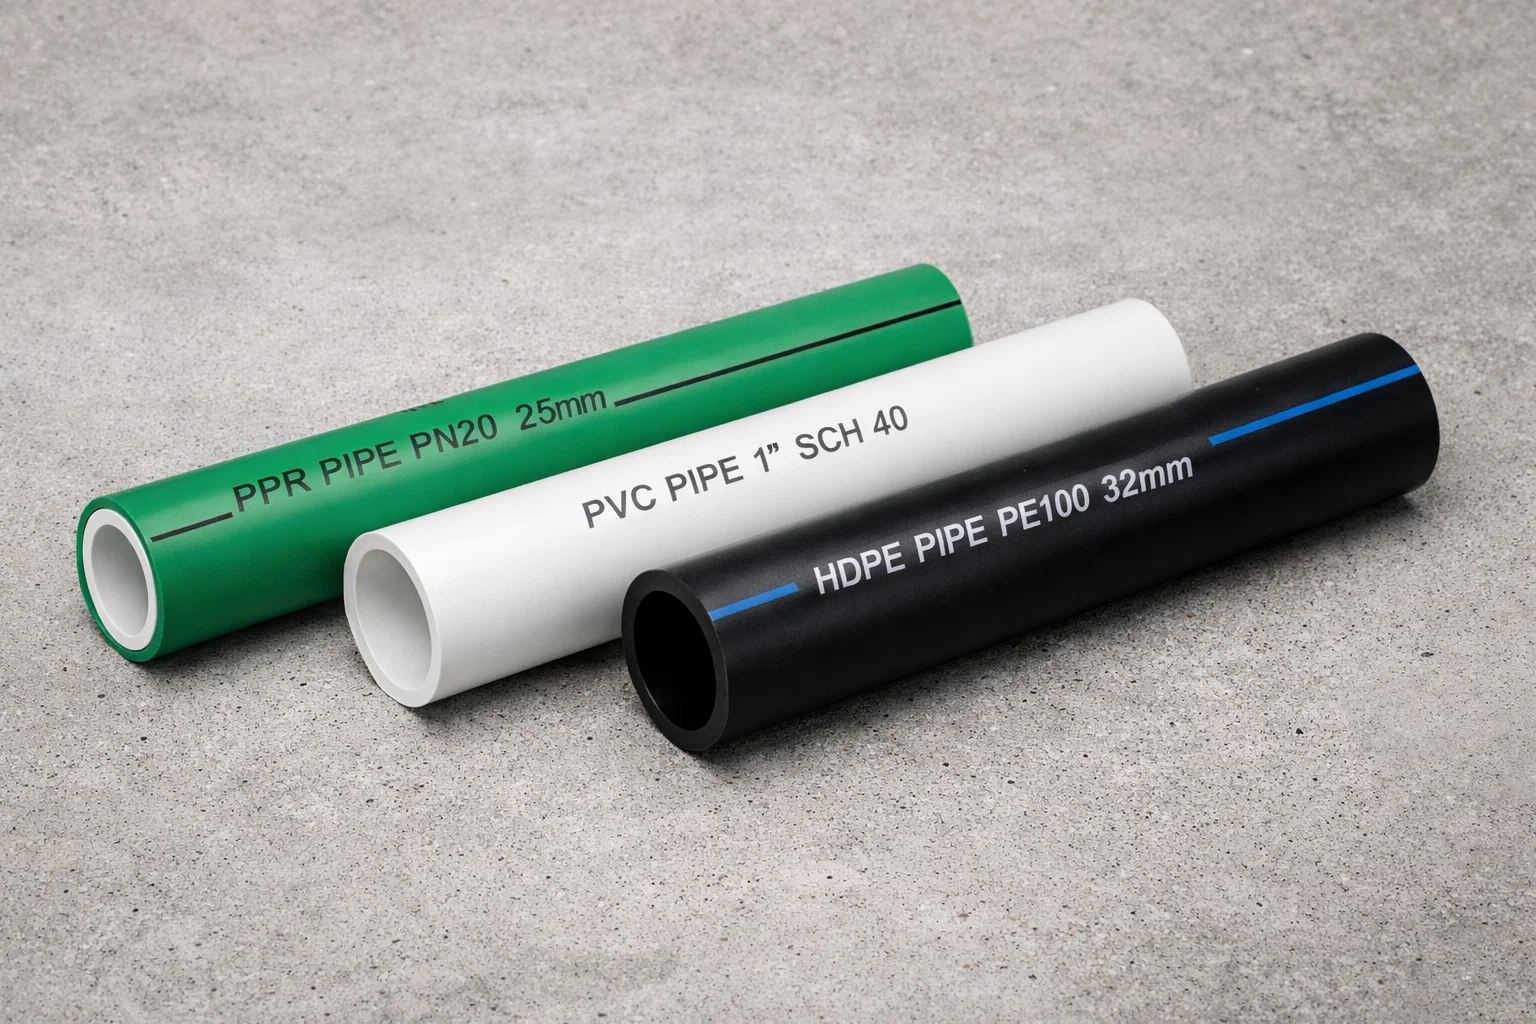
Understanding what is PVC pipe helps you appreciate why proper gluing technique is crucial. PVC (Polyvinyl Chloride) is a thermoplastic material widely used in plumbing, irrigation systems, and drainage applications due to its durability, affordability, and resistance to corrosion.

Why Proper PVC Gluing Technique Matters

  • Prevents costly water leaks and property damage
  • Ensures structural integrity of your plumbing system
  • Meets building codes and inspection requirements
  • Saves money on future repairs and replacements
  • Extends the lifespan of your piping system

At Dave Pools, we’ve seen countless installations, and proper gluing technique is the single most important factor in preventing failures.


Essential Tools and Materials Needed

Before you begin learning how to glue PVC pipe, gather these essential items:

Complete set of tools and materials needed for gluing PVC pipes

Required Materials:

Required Tools:

  • PVC pipe cutter or hacksaw (learn proper cutting techniques)
  • Deburring tool or sandpaper
  • Tape measure
  • Marker or pencil
  • Safety gloves and eye protection
  • Ventilation mask (for enclosed spaces)

Pro Tip:

Always purchase high-quality PVC cement and primer from reputable suppliers. At Dave Pools, we offer premium-grade adhesives that ensure maximum bond strength and longevity.


7 Steps to Glue PVC Pipe Correctly

Follow these proven steps to master how to glue PVC pipe for leak-free, professional results:

Step 1: Cut the PVC Pipe to Size

Using PVC pipe cutter to make clean perpendicular cut on pipe

Accurate cutting is the foundation of a successful PVC connection. Use a PVC pipe cutter or fine-toothed saw to make a clean, square cut. Uneven cuts create gaps that prevent proper bonding.

Key Points:

Step 2: Deburr and Clean the Edges

Deburring PVC pipe edges to remove rough burrs after cutting

After cutting, remove all burrs and rough edges using a deburring tool or sandpaper. Burrs prevent the pipe from fully seating in the fitting and create weak spots where leaks can develop.

Cleaning Process:

  1. Sand the outside of the pipe end
  2. Remove all plastic shavings
  3. Wipe clean with a dry cloth
  4. Ensure surfaces are completely dry before proceeding

Step 3: Dry-Fit the Connection

Never skip the dry-fit step! Insert the pipe into the fitting without glue to check for:

  • Proper fit and alignment
  • Correct pipe depth insertion
  • Any obstructions or defects
  • Marking the insertion depth with a pencil

Pro Insight: The pipe should insert smoothly with slight resistance. If it’s too loose or too tight, there’s a problem with either the pipe or fitting quality. Learn more about choosing quality PVC pipe manufacturers.

Step 4: Apply PVC Primer

Applying purple PVC primer to pipe and fitting before cementing

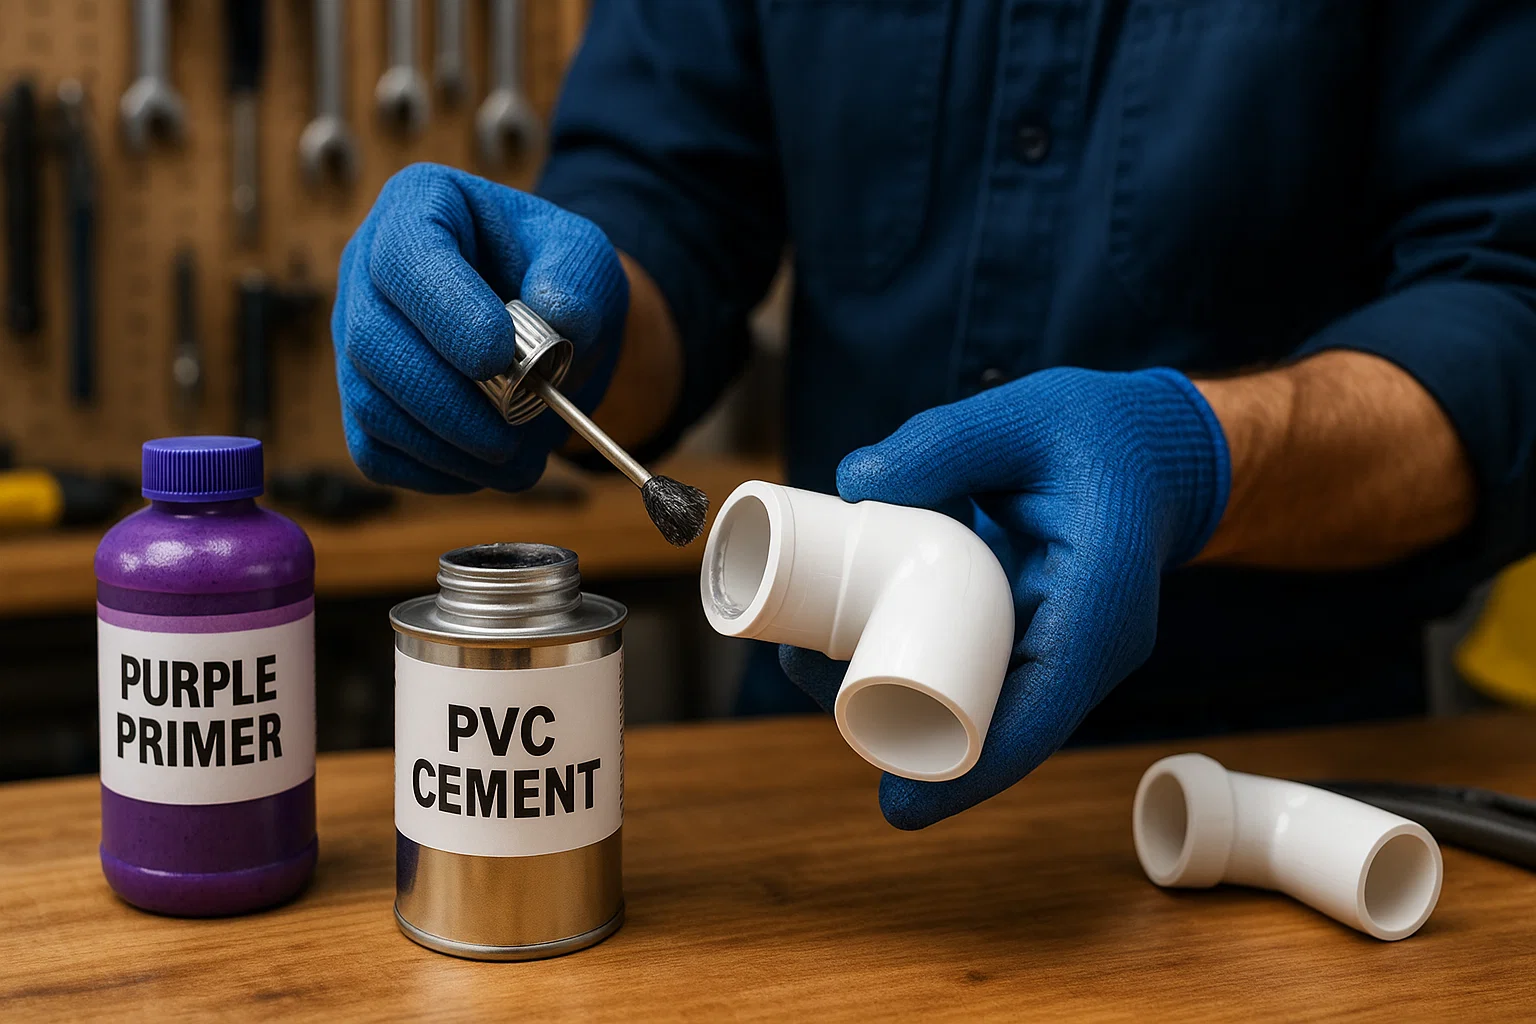
PVC primer is not optional – it’s essential for a proper bond. The primer:

  • Softens the PVC surface for better chemical welding
  • Cleans away any contaminants
  • Prepares the surface for cement application

Application Technique:

  1. Apply primer to the outside of the pipe first (about 1-2 inches beyond insertion point)
  2. Apply primer to the inside of the fitting
  3. Work quickly – primer dries fast
  4. Use even, generous coats without dripping

Step 5: Apply PVC Cement Immediately

Applying PVC cement quickly to primed pipe surface

Timing is critical when applying PVC cement. Work quickly but carefully:

Application Method:

  1. Apply cement to the pipe first – use a thick, even coat
  2. Apply cement to the fitting – coat the inside socket generously
  3. Work in under 10 seconds after applying primer
  4. Use enough cement to ensure complete coverage (better too much than too little)

Important: Different pipe diameters require different cement applicator sizes. For larger diameter pipes, use larger applicators to ensure proper coverage.

Step 6: Join and Twist the Connection

Joining PVC pipe and fitting with quarter-turn twist for proper bonding

This is where the magic happens:

  1. Insert the pipe into the fitting with a firm, steady push
  2. Twist 1/4 turn (90 degrees) immediately after insertion
  3. Hold firmly for 15-30 seconds to prevent the joint from pushing back out
  4. Align marks you made during dry-fitting

Why twist? The twisting motion:

  • Distributes cement evenly around the entire joint
  • Ensures complete surface contact
  • Eliminates air pockets that cause weak spots
  • Creates a uniform chemical weld

Step 7: Wipe Excess and Allow to Cure

Wiping excess PVC cement from completed joint before curing period

Final touches matter:

  1. Wipe away excess cement with a clean rag
  2. Keep the joint undisturbed during initial set time (5-15 minutes)
  3. Allow proper cure time before pressure testing (see section below)
  4. Inspect the joint for a continuous bead of cement around the connection

Common Mistakes to Avoid When Gluing PVC Pipe

Even experienced DIYers make these critical errors:

1. Skipping the Primer

Consequence: Weak bonds that fail under pressure. Primer is essential for proper chemical welding.

2. Using Too Little Cement

Result: Incomplete coverage leads to leaks and joint failure. Always err on the side of generous application.

3. Not Working Fast Enough

Problem: Cement begins setting within seconds. Hesitation creates weak, partial bonds.

4. Forcing Misaligned Joints

Outcome: Stress cracks and immediate or delayed leaks. If alignment is wrong, remove the glue and start over.

5. Testing Too Soon

Error: Applying pressure before full cure causes joint separation. Follow manufacturer’s cure time recommendations.

6. Working in Extreme Temperatures

Issue: Cold weather slows curing; extreme heat causes premature setting. Ideal temperature: 50-110°F (10-43°C).

7. Using Wrong Cement Type

Mistake: Using standard PVC cement on CPVC pipes or vice versa results in complete joint failure.


PVC Glue Drying Time and Curing

Understanding set time vs. cure time is crucial for successful PVC installations:

Initial Set Time (5-15 minutes)

  • Joint is firm but not fully cured
  • Can handle careful movement but no pressure
  • Varies by temperature and cement type

Handling Time (30 minutes – 2 hours)

  • Joint can be gently handled
  • No pressure testing should be performed
  • Assembly can continue to next connections

Full Cure Time (24 hours)

  • Complete chemical weld has formed
  • Ready for full pressure testing
  • Achieves maximum bond strength

Factors Affecting Cure Time:

  • Temperature: Cold weather significantly extends cure time
  • Humidity: High humidity slows curing
  • Pipe diameter: Larger pipes take longer to cure
  • Cement type: Fast-set vs. regular formulas

Professional Recommendation: For irrigation systems and drainage applications, always allow full 24-hour cure time before pressure testing.


Different Types of PVC Cement

Not all PVC cements are created equal. Choosing the right type ensures optimal performance:

Regular-Bodied PVC Cement

  • Best for: General purpose, standard applications
  • Characteristics: Medium viscosity, moderate set time
  • Ideal pipe sizes: 1/2″ to 3″ diameter
  • Typical uses: Home plumbing, basic installations

Medium-Bodied PVC Cement

Heavy-Bodied PVC Cement

  • Best for: Large diameter pipes, cold weather
  • Characteristics: Very thick, excellent gap filling
  • Ideal pipe sizes: 6″ to 12″+ diameter
  • Typical uses: Swimming pool equipment, commercial installations

Fast-Setting PVC Cement

  • Best for: Quick repairs, time-sensitive projects
  • Characteristics: Rapid set time (30 seconds – 2 minutes)
  • Ideal pipe sizes: 1/2″ to 4″ diameter
  • Typical uses: Emergency pipe repairs, tight schedules

Specialized Formulas

  • Low-VOC cement: For indoor use, better air quality
  • All-weather cement: Works in wider temperature range
  • CPVC-specific cement: For CPVC applications only

Important: Never use PVC cement on PPR pipes or HDPE pipes – these materials require different joining methods like heat fusion or mechanical fittings.


Safety Precautions When Gluing PVC

Protect yourself and others while working with PVC cement:

Personal Protective Equipment (PPE)

  • Safety gloves: Prevent skin contact with solvents
  • Safety glasses: Protect eyes from splashes
  • Respirator mask: Essential for enclosed spaces
  • Long sleeves: Minimize skin exposure

Workspace Safety

  • Adequate ventilation: Work outdoors or with fans/open windows
  • No open flames: PVC cement is highly flammable
  • Keep away from children and pets
  • Proper storage: Sealed containers in cool, dry locations

Health Considerations

  • Avoid prolonged exposure to solvent fumes
  • Take breaks in fresh air regularly
  • Wash hands thoroughly after work
  • Seek medical attention if experiencing dizziness or nausea

Environmental Safety

  • Dispose of containers properly according to local regulations
  • Never pour cement down drains
  • Clean up spills immediately with appropriate materials

Troubleshooting PVC Pipe Gluing Issues

Problem: Pipe Won’t Insert into Fitting

Causes:

  • Burrs not removed
  • Wrong size pipe or fitting
  • Defective product

Solutions:

Problem: Joint Leaks After Installation

Causes:

  • Insufficient cement applied
  • Primer skipped
  • Tested before full cure
  • Dirty surfaces

Solutions:

  • Cannot repair – must cut out and redo
  • Remove stuck fittings if necessary
  • Follow proper procedure for replacement

Problem: Cement Dries Too Fast

Causes:

  • Hot weather
  • Old cement
  • Working too slowly

Solutions:

  • Use fast-set cement in cooler parts of day
  • Replace old cement (shelf life: 1-2 years)
  • Practice dry-fitting to improve speed

Problem: Glue Won’t Hold

Causes:

  • Wrong cement type
  • Contaminated surfaces
  • Pipe material incompatibility

Solutions:


Frequently Asked Questions

How long does PVC glue take to dry?

PVC cement sets in 5-15 minutes for light handling, but requires 24 hours for full cure before pressure testing. Temperature and humidity affect drying time significantly.

Can I use PVC glue on CPVC pipes?

No, you must use CPVC-specific cement for CPVC pipes. Using wrong cement type results in joint failure. Learn more about CPVC vs PVC differences.

Is PVC primer really necessary?

Yes, absolutely! PVC primer is essential for creating a proper chemical weld. Skipping primer is the #1 cause of premature joint failure.

What temperature is best for gluing PVC pipe?

Ideal temperature range is 50-110°F (10-43°C). Below 40°F, use special low-temperature cement and extend cure times. Above 110°F, cement sets too quickly.

How much cement should I apply?

Apply a generous, even coat that completely covers all surfaces. You should see a continuous bead around the joint after assembly. Too much is better than too little.

Can I glue PVC pipe when it’s wet?

No, surfaces must be completely dry. Water prevents proper chemical bonding and causes joint failure. Wipe pipes dry and wait for moisture to evaporate.

Why did my PVC joint crack?

Common causes include:
Over-tightening during assembly
Stress from misalignment
Freezing water expansion
Poor quality PVC pipe material
Testing before full cure

How do I remove dried PVC glue?

Once cured, PVC cement cannot be removed – it’s a permanent chemical weld. For mistakes, you must cut out the joint and start over. Learn about removing PVC glue from surfaces.

Can I glue PVC to other materials?

PVC cement only works with PVC and sometimes ABS. For connecting to other materials like HDPE, PPR, or metal, use mechanical fittings or adapters.

What’s the shelf life of PVC cement?

Unopened: 2-3 years. Once opened, use within 6-12 months for best results. Cement becomes thick and less effective over time.

How do I know if I applied enough primer?

You should see a purple (or clear) stain extending beyond where the pipe inserts into the fitting. If you can’t see distinct primer coverage, apply more.

Can I fix a leaking PVC joint without replacing it?

No, attempting to add more cement over a cured joint doesn’t work. The only proper fix is to cut out the joint and redo it correctly.

Do I need to glue both the pipe and fitting?

Yes, always! Apply cement to both surfaces for maximum bond strength. Applying to only one surface results in weak, unreliable joints.

How deep should the pipe go into the fitting?

The pipe should fully seat to the socket depth. Most fittings have a built-in stop. Mark depth during dry-fitting to ensure complete insertion.

Is there a difference between PVC glue and PVC cement?

No, they’re the same product. “Glue” is a common term, but “solvent cement” is technically correct since it chemically welds rather than glues.

Conclusion

Mastering how to glue PVC pipe is a fundamental skill that ensures reliable, leak-free plumbing systems for decades. By following this comprehensive 7-step guide, using quality materials from trusted suppliers, and avoiding common mistakes, you’ll achieve professional-grade results every time.

Key Takeaways:

  • Always use both primer and cement for proper bonding
  • Work quickly but carefully – cement sets fast
  • Allow full 24-hour cure time before testing
  • Choose the right cement type for your application
  • Safety first – ventilate properly and use PPE

Whether you’re installing irrigation systems, drainage pipes, or home plumbing, these techniques ensure lasting performance and peace of mind.

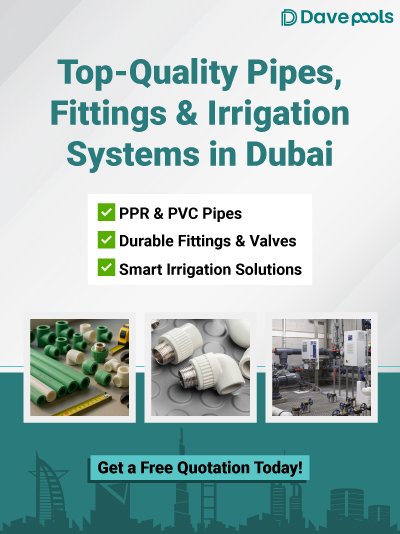
Need high-quality PVC pipes, fittings, and adhesives? Contact Dave Pools – your trusted supplier in Dubai for all piping solutions.


About Dave Pools

Dave Pools is a leading supplier of PVC pipes and fittings, irrigation systems, and swimming pool equipment in Dubai, UAE. We provide premium-quality products from top brands including Cosmoplast, Raktherm, and Cepex, backed by expert guidance and exceptional customer service.


Related articles